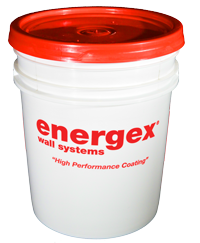
Enermix is a 100% acrylic based product which is field mixed one-to-one by weight with Portland cement to produce the Enermix Adhesive/Embedding mixture.
| Uses | Enermix is used to adhere insulation board to an approved substrate and to embed reinforcing mesh as part of the base coat of the energex® System. Mixture can also be used as a skim coat to produce a smooth level surface on masonry or concrete. |
| Surface Preparation | Application is to energex® recommended substrates. Typically, these include exterior grade gypsum sheathing on either steel or wood studs, clean unpainted concrete, concrete block, brick and stucco. Masonry, concrete and brick substrates must be flat within 1/4” in any four foot radius. For other substrates, please contact the energex® Representative. Surfaces must not be below 40°F or painted and must be clean, dry, structurally sound and free of efflorescence, grease, oiI, form release agents, and curing compounds. |
| Cautions and Limitations | •Clean potable water may be added to adjust workability. Do
not add water until after the cement is thoroughly mixed. DO
NOT OVERWATER. •Use only Type I or Type II, grey or white, Portland cement. •Do not install Enermix on the substrate using the notch trowel. |
| Mixing | Thoroughly mix the Enermix with Type I or Type II Portland cement at 1: 1 ratio by weight. Allow the mixture to set for 5 minutes. Re-temper by adding a small amount of water to achieve the desired workability. |
| Job Conditions | Temperature for application of Enermix must be 40°F or higher and must remain so for a minimum of 24 hours. |
| Storage | Enermix must be stored at 40°F or above in tightly sealed containers out of direct sunlight. |
| Adhesive Application | Using a stainless steel trowel, install a ribbon of Enermix 2” (51 mm) wide by 3/8” (10mm) thick around the entire perimeter of the Insulation Board. Place eight dabs of Enermix 3/8” (1 Omm) thick by 4” (1 02mm) in diameter approximately 8” (204mm) on center to the interior area. Alternatively, a notch trowel may be used to install the Enermix on the entire back of the Insulation Board. The 2” (51 mm) wide by 3/8” (10mm) thick ribbon must be installed around t he entire perimeter of the board. (CAUTION - Do not install Enermix on the substrate using the notch trowel.) Immediately place the Insulation Board on the substrate and slide into position. Do not allow the Enermix to form a skin before positioning the Insulation Board on the substrate. |
| Embedding Application | Use a stainless steel trowel to apply Enermix to the surface of the Insulation Board to a uniform thickness as recommended for type of reinforcing mesh being installed. Immediately place the reinforcing mesh against the wet Enermix. The surface of the Enermix is smoothed with a trowel until the reinforcing mesh is fully embedded. The pattern of the mesh must not be visible. |
| Temporary Protection | Shall be provided at all times until basecoat, finish, and permanent flashing, sealants, etc. are completed to protect the wall from weather and other damage. |
| Drying Time | The drying time of the Enermix Base Coat is dependent upon the air temperature and relative humidity. Under average drying conditions (70°F, 55% R.H.), protect work from rain for at least 24 hours. When used to bond insulation board to approved substrate, a period of 24 hours must elapse to allow the Enermix to form a positive bond. The Insulation Board should not be worked on while the Enermix is curing. |
| Working Time | After mixing, the working time of Enermix is approximately one hour depending on ambient conditions. |
| Bond Strength | (ASTM D-897): 60 psi (gypsum sheathing) 160 psi (concrete block) |
| Clean Up | Clean tools with water while Enermix is still wet. |
| Coverage | Approximately 120 square feet of surface area per 60 lb. pail. This includes adhesive and base coat layers. |


